How admin can hide many menus of WCFM Marketplace
Admin can customize the vendor dashboard as per requirements.Admin can hide and show vendor dashboard menu from admin dashboard settings.So let's look settings one by one.
Settings for hide vendor dashboard activity
Go to admin dashboard -> settings -> Dashboard.There admin will see the settings for disable vendor dashboard menus.You can see the settings for disable menus in below image.Changes from these settings will appear in the Vendor Dashboard and Admin Dashboard both.

1. Disable Welcome Box - Checking this option will disable the welcome box to the vendor dashboard.This box shows the name of the vendor, the name of Site and the login details.

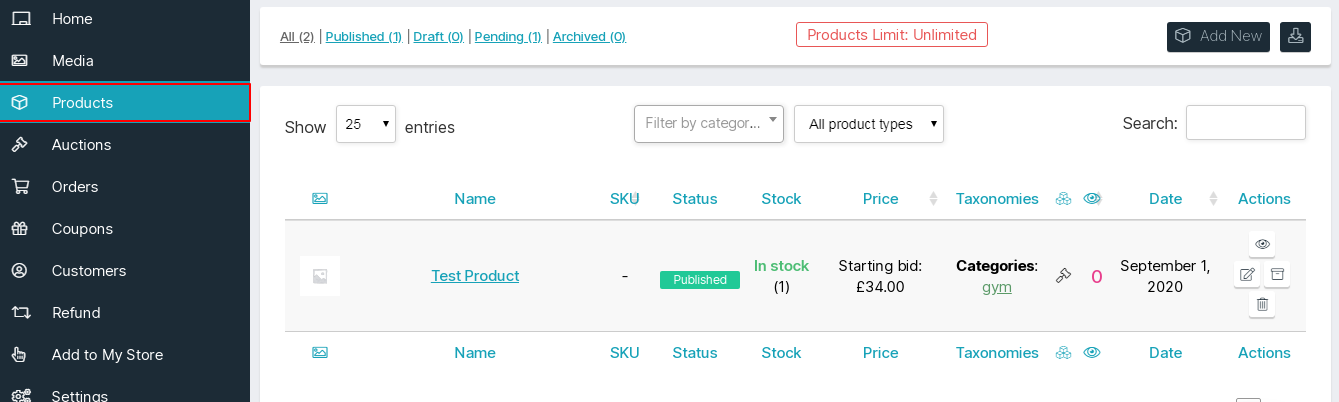
2. Disable WCFM Menu - Selecting this option will disable the vendor dashboard menu.The Vendor dashboard Side menu will disable as shown in the below images.


3. Disable Theme Header - Selecting this option disables the theme header.Theme header includes site menu and logo that will be hidden.If the admin does not want to display theme header to vendor then select this option.
4. Disable WCFM Full View - Admin can select this option if he does not want to show the vendor dashboard in full view. Selecting this option will reduce the width of the vendor dashboard as shown in below image.

5. Disable WCFM Slick Menu - Change the default menu layout in vendor dashboard by selecting this option as shown in below image.

6. Disable WCFM Header Panel - Selecting this option will disable the vendor dashboard header panel.It includes notification board, inquiry board, announcement, knowledge base and profile.All these options will be disabled as shown in below image.


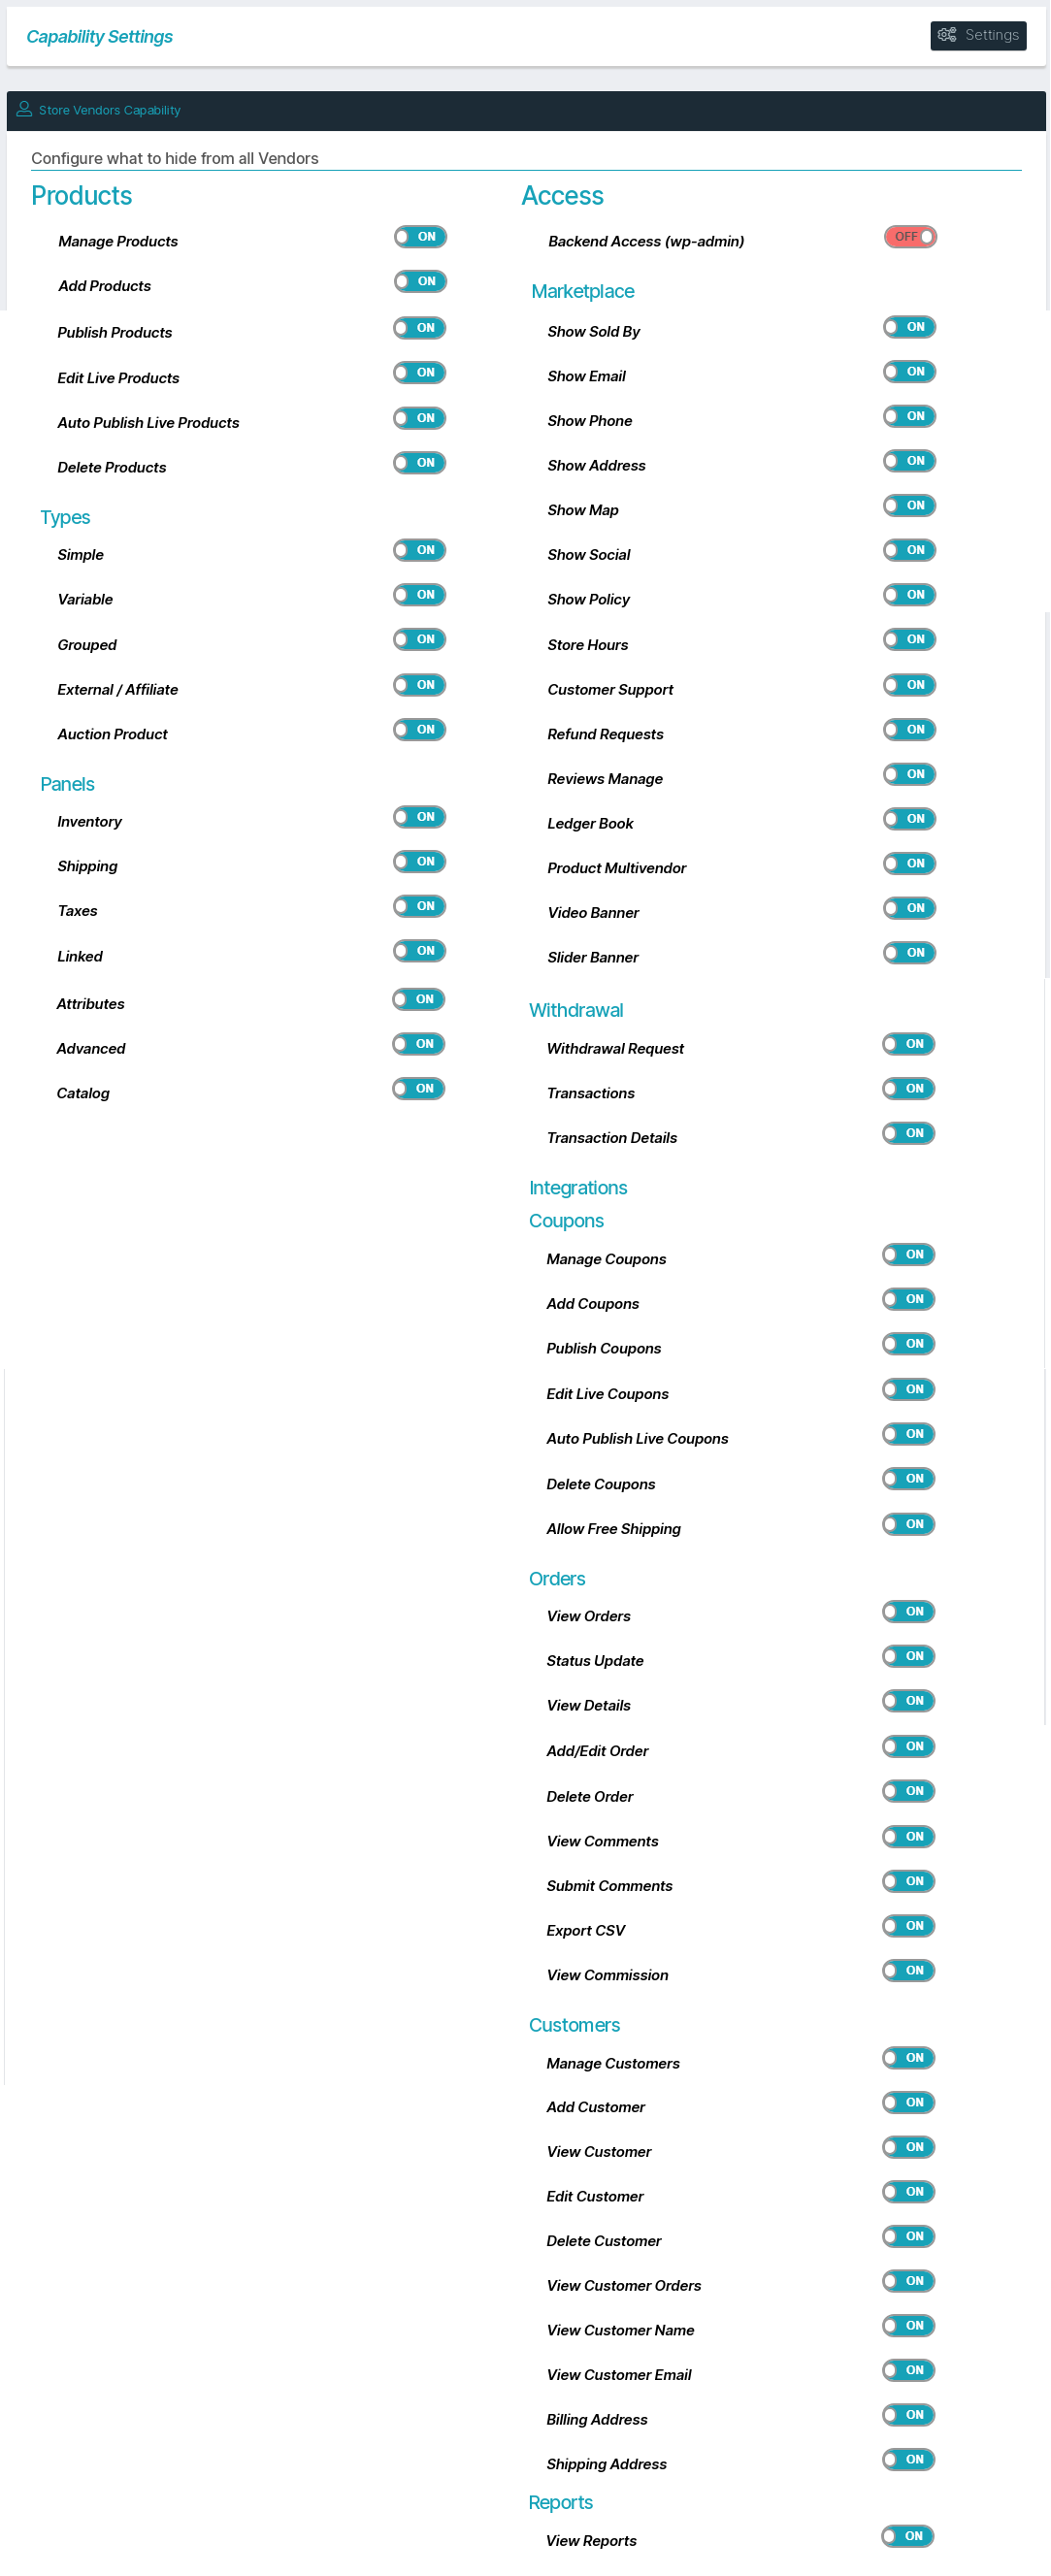
Configure what to hide from all Vendors
Go to admin dashboard -> Capability.There admin will see the configuration for disable vendor dashboard menus.You can see these configuration in below image.It can be used to hide many functionalities in vendor dashboard.So let's look at some of these important settings.
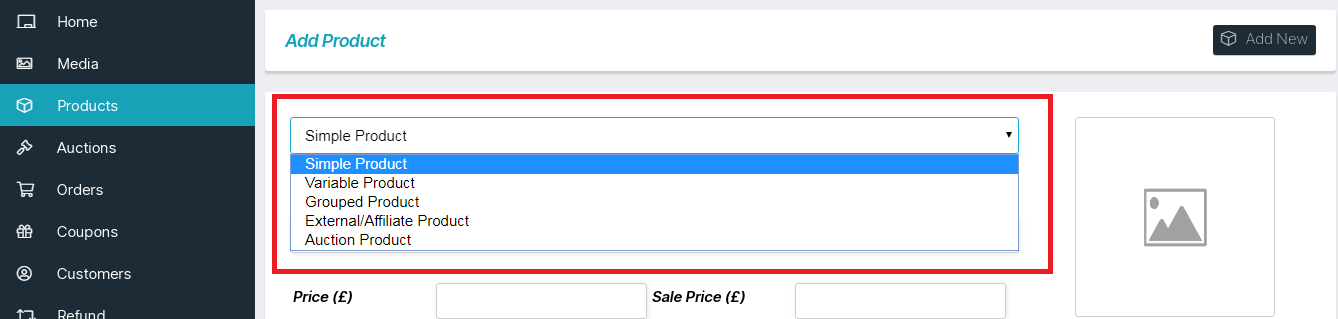
 2 . Type - This setting is used to disable the product type. When the vendor creates a product, it will show a dropdown for the product type. Items can be disabled in dropdown by switching off setting options.
- Show Sold By - This option gives admin the capability to allow/disallow the users to show the name of the selling person for the product in the site.If this option is on,users will be able to show the name of the selling person for the corresponding product in the site.If this option is off,users will not be able to show the name of the selling person for the corresponding product in the site.
- Show Email - This option gives admin the capability to allow/disallow the users to display the email of the selling person for the product in the site.If this option is on,users will be able to display the email of selling person for the corresponding product in the site.If this option is off,users will not be able to display the email of selling person for the corresponding product in the site.
- Show Phone - This option gives admin the capability to allow/disallow the users to display the phone number of the selling person for the product in the site.If this option is on,users will be able to display the phone number of selling person for the corresponding product in the site.If this option is off,users will not be able to display the phone number of selling person for the corresponding product in the site.
- Show Address - This option gives admin the capability to allow/disallow the users to display the address of the selling person for the product in the site.If this option is on,users will be able to display the address of selling person for the corresponding product in the site.If this option is off,users will not be able to display the address of selling person for the corresponding product in the site.
- Map - This option gives admin the capability to allow/disallow the users to display the address of the selling person in a map for the product in the site.If this option is on,users will be able to display the address of the selling person in a map for the corresponding product in the site.If this option is off,users will not be able to display the address of the selling person in a map for the corresponding product in the site.
- Show Social - This option gives admin the capability to allow/disallow the users to display the social media profile of the selling person for the product in the site.If this option is on,users will be able to display the social media profile of selling person for the corresponding product in the site.If this option is off,users will not be able to display the social media profile of selling person for the corresponding product in the site.
- Show policy - This option gives admin the capability to allow/disallow the user to display the policy of the vendor store.If this option is on,users will be able to display the policy of the vendor store.If this option is off,users will not be able to display the policy of the vendor store.
- Store hours - This option gives admin the capability to allow/disallow the user to set the timing of their store.If this option is on,users will be able to set the timing of their store. If this option is off,users will not be able to set the timing of their store.
- Customer support - This option gives admin the capability to allow/disallow the users to enable customer support for their store.If this option is on,users will be able to enable customer support for their store.If this option is off,users will not be able to enable customer support for their store.
- Refund requests - This option gives admin the capability to allow/disallow the user to address the refunds for their products.If this option is on,users will be able to address the refunds for their products.If this option is off,users will not be able to address the refunds for their products.
- Review Manage - This option gives admin the capability to allow/disallow the user to manage the reviews given for their products.If this option is on,users will be able to manage the reviews given for their products.If this option is off,users will not be able to manage the reviews given for their products.
- Ledger Book - This option gives admin the capability to allow/disallow the user to access the ledger book of store sales.If this option is on,users will be able to access the ledger book of store sales.If this option is off,users will not be able to access the ledger book of store sales.
- Product Multivendor - This option gives admin the capability to allow/disallow the vendor to sell products of other vendors from their store.If this option is on,users will be able to sell products of other products from their store.If this option is off,users will not be able to sell products of other products from their store.
- Video banner - This option gives admin the capability to allow/disallow the vendor to setup video banner for their store.If this option is on,users will be able to setup video banner for their store.If this option is off,users will not be able to setup video banner for their store.
- Slider banner - This option gives admin the capability to allow/disallow the user to setup slider banner for their store.If this option is on,users will be able to setup slider banner for their store.If this option is off,users will not be able to setup slider banner for their store.
5. Withdrawal
- Withdrawal Request - Turning on this option will allow the vendor to withdraw the amount to their respective account.
- Transactions - Turning on this option will allow the vendor to access the transactions performed by them in recent times.
- Transaction Details - Turning on this option will allow the vendor to access the details of each transaction performed by them.
6. Coupons - This setting is used to disable functionality of coupon menu.It has many sub-settings that can be used to hide different functionality of coupon menu.Turning "Manage Coupons" button off will disable the entire coupon menu in the vendor dashboard.It has many other settings like add coupons, publish Coupons, edit live coupons, auto publish live coupons, delete coupons, allow free shipping. All these options can be enabled or disabled as per the admin's choice.

7. Orders - The vendor receives many orders from users.so, this setting is used to disable functionality of order menu in vendor dashboard.Turning "View Orders" button off will disable the entire order menu in the vendor dashboard.It will not allow the vendor to view the orders, add/edit/delete orders from dashboard.It has many other settings like status update, view details, add/edit order, delete order, view comments, submit comments, export CSV, view commission.All these options can be enabled or disabled as per the admin's choice.
8. Customers - This setting is used to disable functionality of customers menu.It has many sub-settings that can be used to hide different functionality of customers menu.Turning "Manage Customers" button off will disable the entire customer menu in the vendor dashboard.It has many other settings like add customer, view customer, edit customer, delete customer, view customer orders, view customer name, view customer email, billing address, shipping address.If you don't want to disable the whole menu, you can use all these settings and disable some functionality. All these options can be enabled or disabled as per the admin's choice.
9. Reports - The admin can view the report of the entire store for all the vendors, on the contrary the vendors can only see the reports for their store. However, the ability to view the reports for the vendors depends upon the admin. So, admin can set this setting from here.